
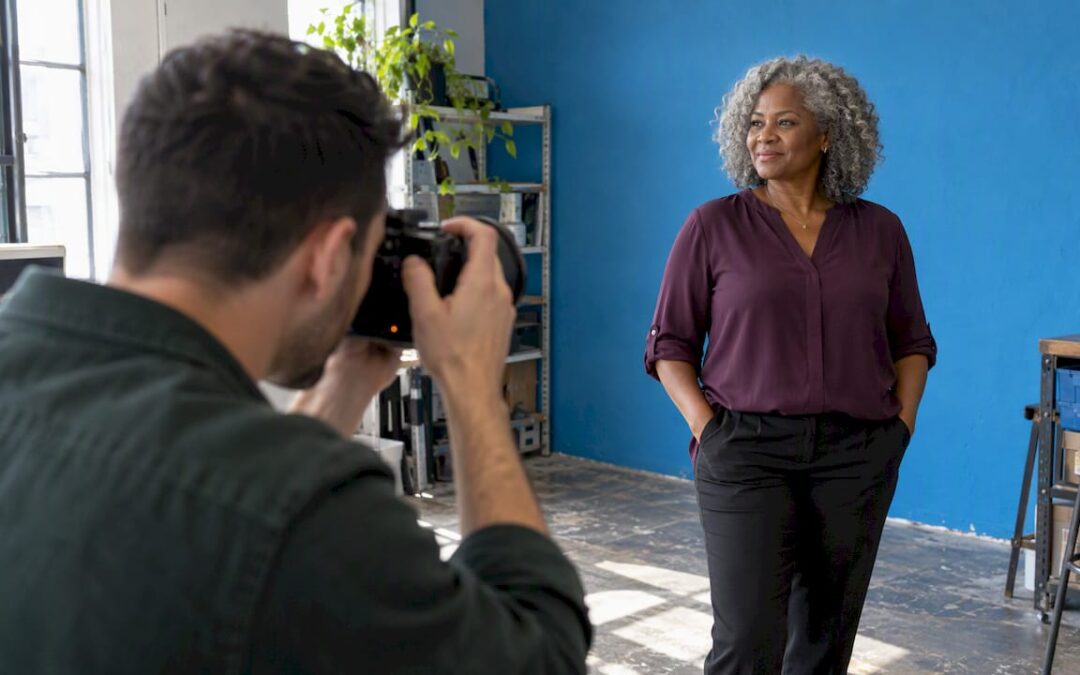
A good brand photoshoot is decided before the camera comes out. Define what the photos are for, collect a visual direction, turn both into a shot list, and book the right photographer, location and day. Then prepare people, props and logistics so the shoot day is execution, not improvisation. This guide walks through each step in order and ends with a checklist you can copy.
TL;DR
- Start with purpose: where each image will run (website, social, ads, packaging, press) decides what you shoot and in what format.
- Build a mood board and a shot list split into must-haves and nice-to-haves before you book anyone.
- Choose a photographer for fit with your brand and clear usage terms in writing, not only for a pretty portfolio.
- Prepare outfits, props, location permissions and a run-of-day schedule at least a week ahead.
- After the shoot, name, tag, resize and place the images quickly, or the investment sits in a folder.
Table of Contents
- Start with what the photos have to do
- Build a visual direction you can show
- Write the shot list
- Choose the photographer
- Pick the location
- Prepare people, props and wardrobe
- Build the run-of-day schedule
- Brand photoshoot checklist
- Put the photos to work
- Our perspective
- Where All City Graphix fits
- FAQ
- Sources
Start with what the photos have to do
Most bad shoots fail at the first step: nobody wrote down why the shoot was happening. “We need new photos” is not a goal. “We need a hero image and three team portraits for the new website, plus twelve social posts for the launch month” is.
Before you plan anything visual, answer four questions in a one-page brief:
- Who are you talking to? Describe your ideal customer in a few sentences, not a demographic label.
- What is your brand about? Write down your mission, your values and three words that describe your personality. If you cannot agree on the three words, you are not ready to shoot.
- What should viewers feel? Trust, energy, calm, exclusivity. Pick one or two emotions.
- Where will the images live? Website, social media, advertising, email, print, packaging, a pitch deck, a trade show wall.
The last question matters more than it looks. Every channel has its own shapes and sizes. A wide website header, a vertical story and a square marketplace thumbnail all crop the same photo differently. If you know the uses up front, the photographer can leave empty space in the frame for headlines, shoot some vertical and some horizontal frames, and deliver files at the sizes you need.
Also write one measurable target per use. A new About page that lifts time on page, an Instagram grid that stays consistent for three months, or a sales deck that stops relying on stock photos: any of these is fine. Without a target, you cannot judge afterward whether the shoot was worth repeating, a point that photography planning guides commonly make about skipping goal-setting.
If your brand foundations are still shifting, fix those first. Photos shot before your colors, tone and logo are settled tend to date quickly. Our guides on choosing 2 to 4 brand colors and on building a living brand style guide are good places to lock the visual rules the photos will have to follow.
Build a visual direction you can show
Words like “clean, modern, warm” mean something different to every person who reads them. Images do not. A mood board is the fastest way to get you, your team and your photographer looking at the same thing.
How to make a useful mood board
- Collect 15 to 25 images from Pinterest, Instagram, magazines, or past campaigns you admire. Include different kinds of shots: wide scenes, portraits, details.
- Sort them into three groups: love this, like the color, like the composition. Photographers need to know why you saved each image.
- Add a few images you do not want. “Not this” saves more time than another ten references.
- Pull a palette. Your brand colors should appear in wardrobe, props or backgrounds, not only in the logo.
- Keep it short. A mood board that is 80 images long is a Pinterest account, not a brief.
The point is not to copy someone else’s pictures. It is to agree on lighting (bright and airy or moody and dramatic), color temperature, how close the camera sits to people, and how staged or candid the result should feel.
Write the shot list
A shot list is a plan of every image you need, with the subject, composition, props, location and intended use for each. It is the single document that stops you from realizing at 4 p.m. that nobody photographed the storefront.
Build it from your purpose list, one channel at a time. For a typical small business, the core categories look like this:
| Shot type | What it is | Typical use |
|---|---|---|
| Hero or banner | Wide, uncluttered image with room for text | Website home page, landing pages, email headers |
| Team and founder portraits | Headshots plus a few in-action portraits | About page, LinkedIn, press kits, proposals |
| Work in progress | You or your team doing the actual work | Services pages, social posts, case studies |
| Product or detail | Close-ups of products, tools, textures | Shop pages, packaging, ads, social |
| Environment | Storefront, studio, office, signage | Contact page, Google profile, local marketing |
| Customer moments | Real or staged interactions (with signed releases) | Testimonials, social proof, campaigns |
| Flat lays and graphics-ready | Simple backgrounds for overlays | Announcements, promotions, stories |
Must-haves and nice-to-haves
Split the list in two. Must-haves are the images you will be unhappy to leave without, such as the hero image and the team portraits. Nice-to-haves are extras if light and time allow. Shoot the must-haves first. Energy fades, light changes, and the second half of the day is when you discover that the founder hates being photographed.
Plan the format of each shot
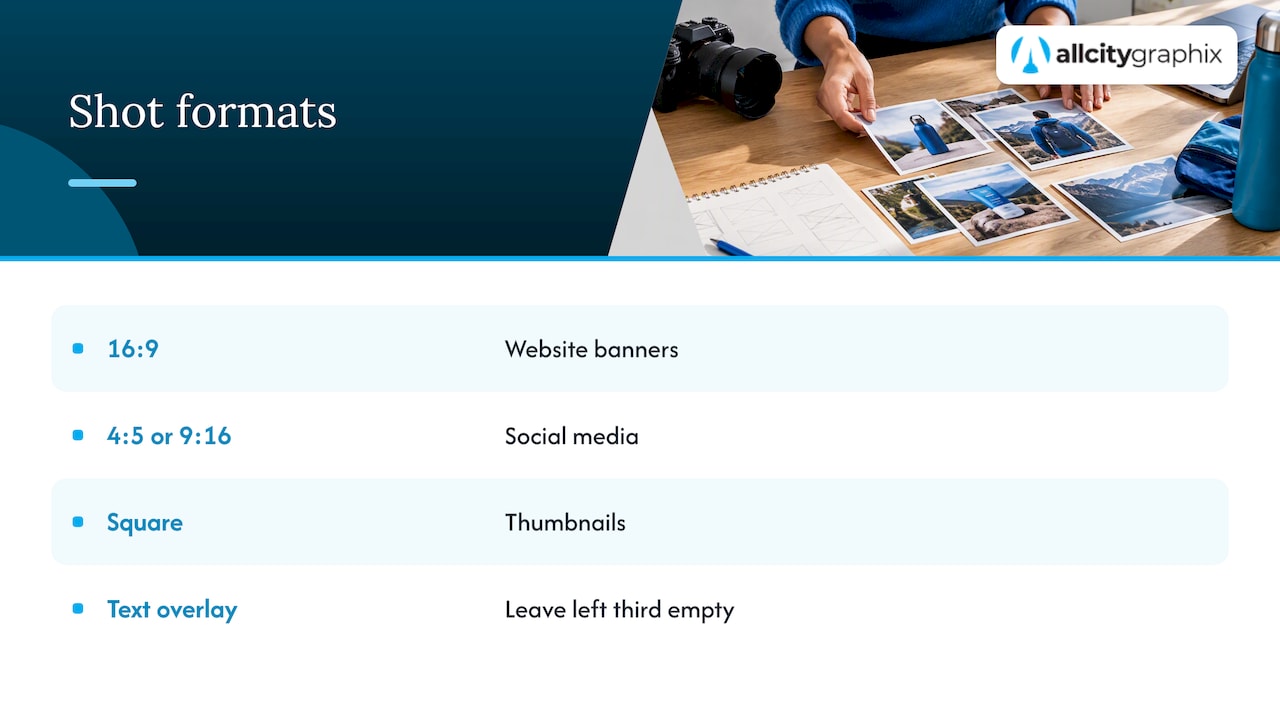
Next to each shot, note the aspect ratio and orientation: 16:9 for banners, 4:5 or 9:16 for social, square for thumbnails. Add a line such as “leave the left third empty” for any image that will carry text. When a photographer knows a shot is for a header, they compose it differently than a shot for a portfolio.
Count how many images you need
Be realistic. A website refresh often needs fewer final images than people expect, perhaps a dozen strong ones, while a social calendar eats volume. Multiply: how many posts a week, for how many weeks, before the next shoot? Ask the photographer to build variation into each setup (wide, medium, detail, vertical, horizontal) so one scene produces several usable images.
Choose the photographer
This is the decision that shapes everything else. Look for fit, not just talent.
Review portfolios for your kind of work. A wedding photographer and a commercial brand photographer solve different problems. Look for consistency across a body of work, and for subjects like yours: small teams, service businesses, products, food, interiors.
Check that the style matches your mood board. If your references are bright and natural and their portfolio is dark and editorial, move on.
Have a call. The best brand sessions depend on a photographer who puts people at ease. Ask how they direct nervous subjects, how they handle a team of ten in one afternoon, and how they plan around changing light.
Ask what the process looks like. A professional will usually offer a consultation, ask for your brief and mood board, and propose a schedule. If they skip all of that, expect a loose shoot.
Get usage terms in writing. In a typical commercial arrangement the photographer keeps the copyright and grants you a license, so what you can do with the files depends on the agreement. Settle these points before you pay a deposit:
- Where you can use the images (web, print, paid ads, packaging, resale).
- For how long the license runs.
- Whether it is exclusive to you.
- Whether you may edit, crop, retouch or add text.
- How many final edited images you receive, and in what file formats.
- What the photographer may do with the images (portfolio, their own marketing).
And ask for a timeline: when you get a preview gallery, when edited files arrive, and how many revision rounds are included.
Pick the location
Location is part of your brand story, so choose it on purpose.
- Your own space is the most authentic. It shows customers where they will be served, and it costs nothing in rental fees. Tidy it, remove visual clutter and test the light at the time of day you plan to shoot.
- A studio gives you control over light and backgrounds, which suits product work and portraits with a consistent look.
- An outdoor or public place adds variety. Check the rules first. In a city, many public locations need permission or a permit for commercial shoots, and private property needs the owner’s approval.
- A rented space (a cafe, a gallery, a co-working floor) can work if it matches your brand. Confirm hours, noise, and whether the owner allows commercial photography.
Whatever you choose, do a scout visit or at least a video walkthrough with the photographer. Note where natural light falls, where power outlets are, where you can change clothes, and where you can park or unload.
If people other than your staff appear in the images, get releases signed. The same applies to private property and trademarked materials. The nonprofit mentoring organization SCORE, for instance, advises its chapters to create original local photos and to have releases signed for people, trademarked materials or private property. Good practice for any business.
Prepare people, props and wardrobe
The week before the shoot is where polished results are made.
Wardrobe
- Choose solid colors or simple textures. Small patterns, large logos and stripes distract or create visual noise on camera.
- Pick colors that sit with your brand palette without matching it exactly. A team dressed head to toe in the logo color looks like a uniform; one accent does the job.
- Bring two or three options per person, and an extra layer such as a jacket or blazer to change the look without changing the whole outfit.
- Wear what you actually wear. Clothes that fit well and feel like you beat anything new and stiff.
- Iron or steam everything the day before.
Props and products
- Bring only what supports the story: your tools, your packaging, your product in its best condition.
- Clean and check every product. Dust and fingerprints are far cheaper to remove before the shoot than in editing.
- Bring duplicates of anything that can break, spill or run out.
- Remove logos of other brands unless they are part of your story.
If product photos are a big part of your shot list, our guide to a one-light product photography setup covers what you can do in-house between professional shoots.
Hair, grooming and comfort
Schedule haircuts several days ahead, not the morning of. Keep water, snacks and a lint roller on hand. People relax in front of a camera when they are comfortable, and that shows in the final frames.
Build the run-of-day schedule
A written schedule keeps everyone calm. A simple structure for a half-day shoot:
- Arrival and setup (30 to 45 minutes). Photographer sets up lighting; you stage the space.
- Must-have shots first. Hero images, then key portraits while everyone is fresh.
- Wardrobe change and second setups. Group by location and outfit to avoid walking back and forth.
- Work-in-progress and detail shots. These are the easiest to relax into.
- Nice-to-haves and candids. Use the remaining time for extras.
- Wrap and review (15 minutes). Check the shot list against what was captured, and ask for a few extra frames of anything missing.
Build in buffer time. Setups almost always run long, and rushing the last portraits is how you end up with a stiff About page.
Assign one person on your side to be the decision-maker on the day. Too many opinions slow the shoot and confuse the photographer.
Brand photoshoot checklist
Copy this and adjust it to your shoot.
Four to two weeks before
- [ ] Written brief: audience, brand words, emotions, uses, targets
- [ ] Mood board with “yes” and “no” images
- [ ] Shot list with must-haves, nice-to-haves, formats
- [ ] Photographer chosen, contract and license terms signed
- [ ] Location chosen, permission or permit confirmed
- [ ] Date set with a backup weather or reschedule date if outdoors
The week before
- [ ] Wardrobe selected, cleaned, pressed
- [ ] Props and products gathered, cleaned, duplicates packed
- [ ] Model or customer releases ready to sign
- [ ] Run-of-day schedule shared with everyone attending
- [ ] Scout visit or video walkthrough completed
- [ ] Parking, building access and elevator booking arranged
The day of the shoot
- [ ] Space tidied, personal items removed from view
- [ ] Shot list printed or on a phone for everyone
- [ ] Releases signed before any shooting begins
- [ ] Must-haves captured first
- [ ] Water, snacks, steamer, lint roller, touch-up kit on hand
- [ ] Final review of the list before the photographer leaves
After the shoot
- [ ] Select favorites within a week while the day is fresh
- [ ] Confirm delivery: file formats, resolution, number of edited images
- [ ] Name files clearly and organize by use (web, social, print)
- [ ] Back up originals in two places
- [ ] Save the license and releases with the files
- [ ] Resize and compress for each channel
- [ ] Add descriptive alt text and titles on your website
- [ ] Schedule social posts and update profiles, listings and the website
- [ ] Record what worked and what you would change next time
Put the photos to work
Plan the rollout before the files arrive. The images should appear in a coordinated way, not drip out as one-offs.
Website first. Replace stock photography on your home, About and services pages. Resize images to the dimensions your layout uses, since oversized files slow pages down. SCORE’s own web guidelines tell editors to resize images and fill in ALT and TITLE fields for accessibility and search, a habit worth copying on every upload.
Then profiles and listings. Google Business Profile, LinkedIn, social cover images, marketplace listings and email signatures.
Then campaigns. Ads, email, launch content and print. If you are planning a launch, the brand launch plan shows how to time assets like these.
Keep a consistent look across channels. A set of photos only builds recognition if the colors, framing and tone repeat. The same principle applies to social media branding: decide on a system first, then feed it with photography.
Our perspective
We have worked on brand identities, websites and campaigns for small businesses, startups and established companies for over 15 years, and the pattern is consistent: photography is where a brand either looks like itself or looks like everyone else. The biggest mistake we see is treating a shoot as a separate errand. Teams book a photographer, show up with a vague idea, and end up with attractive pictures that do not fit the website layout, the color palette or the message.
We plan photography backward from the finished work. Which pages and campaigns will carry these images? What needs to be written over them? Which crops will each channel demand? When that is clear, the shot list almost writes itself, and the photographer’s time goes into craft instead of guesswork.
The second thing we push on is discovery. If you cannot say who the brand is for and what it should make them feel, no amount of beautiful lighting will fix it. That is why our process starts with conversation before design or production, and why leadership stays involved rather than handing everything off.
Finally, we think of a shoot as the start of an asset library, not a one-time event. Name the files, record the license, keep the brief, and the next shoot gets cheaper and better.
— Alex
Where All City Graphix fits
If you want photography that matches a brand strategy rather than sits beside it, we can plan it with you. Our work spans branding and brand identity, web design and development, graphic design, and custom photography for small businesses, startups and established companies, along with ongoing support after launch. Start with a conversation about what the images need to do, and we will shape the brief, the shot list and the rollout around your goals. See the full list of services or get in touch to talk through your project.
FAQ
How far in advance should I plan a brand photoshoot?
Allow roughly four weeks for a first shoot. That gives you time to write the brief, build a mood board and shot list, interview photographers, sign a contract and prepare wardrobe and props. Smaller refresh shoots can move faster, but the brief and the shot list should never be skipped.
What should I bring to a brand photoshoot?
Bring your shot list, mood board, two or three wardrobe options per person, cleaned products and props, and signed releases for anyone who is not on your staff. Add practical items such as water, snacks, a steamer and a lint roller. Confirm with your photographer whether they supply lighting and backdrops.
Who owns the photos after a brand shoot?
In a typical commercial arrangement, the photographer keeps the copyright and grants you a license to use the images. What you may do, where, and for how long should be written into the contract before the shoot. If you need to use images in paid ads, on packaging or by third parties, ask for those uses to be named explicitly.
How many photos do I need?
It depends on your uses, not a fixed number. A website refresh may need a dozen strong images, while a weekly social calendar needs many more. Count how many placements you have between now and your next shoot, then ask the photographer for variations in each setup: wide, medium, detail, vertical and horizontal.
Should I use my own space or a studio?
Use your own space when authenticity matters, such as a shop, kitchen or office customers will visit. Choose a studio when you need controlled light and consistent backgrounds, as with product catalogs or team portraits. Many businesses do both in a single shoot.
Sources
- Image Upload and Guidelines, SCORE Support Center
- How to Plan a Successful Brand Photoshoot: 10 Tips for Businesses, Creative Scope