

Product label design combines brand messaging, required legal copy, and print-ready technical files into one deliverable that has to sell your product and survive regulatory review. For prototypes, a template tool gets you moving fast; for anything going to retail, brief a professional and check your copy against the FDA Food Labeling Guide.pdf) and FTC packaging rules before you print.
TL;DR:
- Proper label design requires detailed technical files, including dielines and color settings, to avoid printing errors and ensure compliance.
- Legal labeling must clearly display product identity, net weight, and manufacturer information, with specific size and placement rules for food and regulated products.
- Effective label hierarchy emphasizes the product name and brand first, with clear contrast and readable typography, especially for small text.
- Material choices depend on product use, with different substrates suited for moisture exposure, durability, and visual effects like transparency.
- Using a professional designer or agency can reduce risks related to compliance, print quality, and vendor coordination, saving costs and avoiding reprints.
Table of Contents
- What Does Product Label Design Actually Include?
- What Legal Information Must Appear on a Product Label?
- How Do You Design a Label That Actually Sells?
- Which Materials and Finishes Should You Choose?
- DIY Templates or a Professional Designer: Which Workflow Fits?
- What Does Product Label Design Cost?
- What File Specs Does Your Printer Need?
- When Does Hiring an Agency Actually Reduce Risk?
- Ready to Get Your Label Print-Ready?
- Sources
- FAQ
What Does Product Label Design Actually Include?
A finished label is really two projects stitched together: a creative one and a technical one. The creative side covers logo placement, product naming, brand hierarchy, and imagery, which is the part most people picture when they hear “label design.” The technical side is what actually gets the file onto a press without errors, and it’s the part first-time founders almost always underestimate.
Here’s what a complete deliverable set looks like:
- Creative files: logo lockups, brand color palette, typography choices, product photography or illustration
- Copy layout: statement of identity, brand story or tagline, ingredient or materials list, usage instructions
- Technical files: dieline (the cut path), bleed area, CMYK or spot color builds, resolution at print size
- Print-ready output: outlined fonts or embedded font files, packaged links, a final PDF proof
A typical project moves through a brief, two or three initial concepts, one or two rounds of revisions, and then a prepress handoff. Skip any of those steps and you risk a label that looks right on screen but prints wrong, misaligned, or blurry. Shopify’s guidance on product label design treats the label as a small billboard: it has one job, communicate fast, and every deliverable above exists to serve that job.
What Legal Information Must Appear on a Product Label?
Before you get creative, get compliant. The Fair Packaging and Labeling Act requires nearly every consumer commodity sold in the United States to show three things clearly: the product’s identity, the net quantity of contents in both metric and inch/pound units, and the name and place of business of the manufacturer, packer, or distributor.
Food products carry extra rules. FDA guidance splits the label into the principal display panel (PDP) and the information panel, each with its own required content and minimum type sizes, sometimes as small as 1/16 inch for certain information-panel items, according to the Food Labeling Guide. Supplements, cosmetics, alcohol, and household chemicals each layer on their own category-specific disclosures, so a label built for a candle won’t pass muster for a tincture.
Compliance Callout: Skipping or mislabeling required copy doesn’t just risk a warning letter. Noncompliance can trigger product recalls and reprinting costs that dwarf what a proper legal review would have cost upfront.
A working checklist before you send anything to print:
- Confirm product identity and net quantity appear on the PDP, not buried on the back
- Check type size against category rules, not just what “looks fine”
- Keep required copy in its own clear zone, separate from decorative art
- Verify manufacturer or distributor name and address are current
How Do You Design a Label That Actually Sells?
Legibility and hierarchy decide whether a shopper picks up your product or scrolls past it in a marketplace thumbnail. The order that works best, in practice: statement of identity first, then brand name, then your value proposition, then supporting details like ingredients or usage.
Small text is where most DIY labels fall apart. A font that looks crisp at 300% zoom on a monitor can turn to mush at actual print size on a 2-inch jar lid. Test your smallest required copy at 100% before approving anything.
- Use high contrast between text and background, not just on-brand color pairings
- Reserve bold color blocks for your value proposition, not the legal fine print
- Keep imagery simple enough to read in a 100 pixel thumbnail on a retail site
- Leave breathing room around mandatory copy so it never looks like an afterthought
Pro Tip: Print a test label at actual size and tape it to the real container before finalizing. Screens lie about scale, and what reads fine at your desk can vanish on a shelf six feet away.
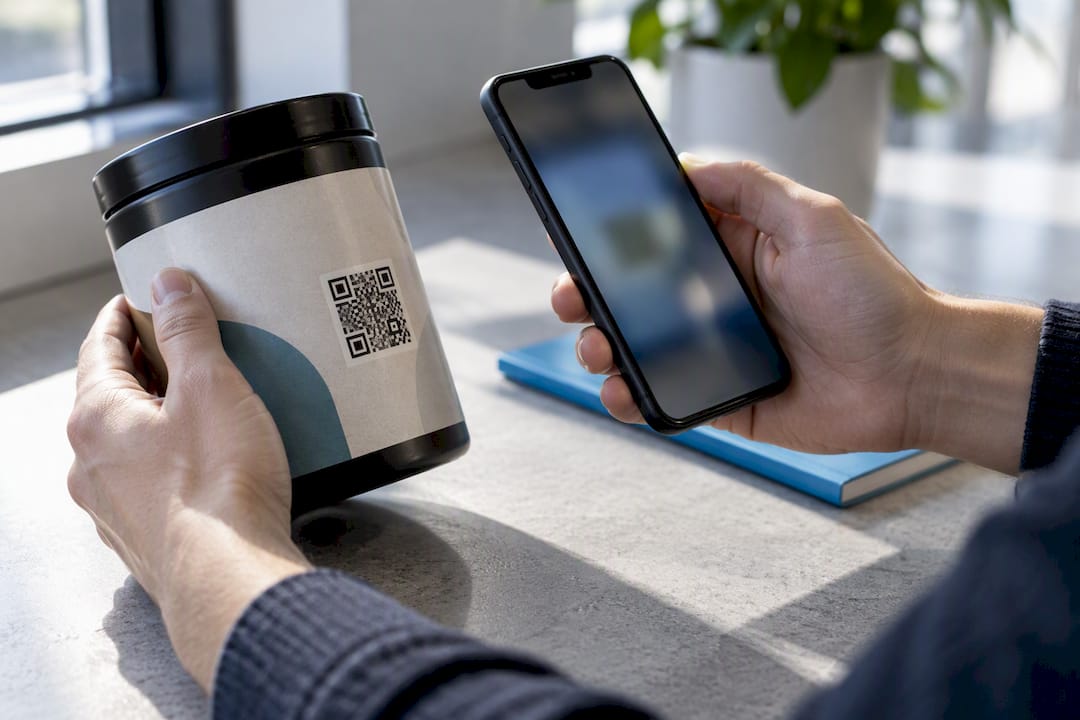
If your packaging includes a scannable element, like a QR code linking to sourcing or ingredient detail, design it with enough contrast to actually scan, not just to match your palette. A code that fails to scan does more brand damage than no code at all.
Which Materials and Finishes Should You Choose?
Substrate choice depends on where your product lives after purchase. A label that never touches water needs different specs than one riding in a shower caddy or a refrigerator.
- Paper stocks work for dry goods, gift items, and anything shelf-stable at room temperature
- Vinyl handles moisture, condensation, and repeated handling, common on beverage and bath products
- Clear film creates a “no label” look but demands higher-contrast art since there’s no white backing
Finishes add both cost and durability. Lamination protects against scuffing and light moisture; varnish adds shine or texture cheaply; foil stamping and embossing signal a premium price point but add setup cost per run. For print method, digital printing suits short runs and prototypes, letting you test a design on a few hundred units without paying for plates. Offset printing brings the per-unit cost down at higher volumes but requires plate setup, which only pays off once you’re past a few thousand units. If your product will sit in a fridge or a humid bathroom, request a water-resistance test swatch before committing to a full run.
DIY Templates or a Professional Designer: Which Workflow Fits?
Templates make sense for prototyping, farmers market runs, or a one-off event SKU where you need something presentable fast. The gap shows up later: most DIY exports skip the dieline, use RGB instead of CMYK, or leave fonts unembedded, all invisible until a printer rejects the file.
A professional workflow typically includes:
- Discovery brief covering brand direction, container specs, and required legal copy
- Concept and revision rounds with prepress-ready files, not just flattened images
- Regulatory copy review checked against FPLA and, for food, FDA placement rules
- Final proofing with a physical proof for color-critical brands before the full run
Before hiring anyone, ask directly what file types they deliver, how many revisions are included, whether prepress review is part of the fee, and what the turnaround looks like. Small-brand owners frequently lack confidence in file prep and color management, which is exactly where supplier or agency guidance pays off most.
What Does Product Label Design Cost?
Budget for design and printing as two separate line items, because they behave differently. Design fees cover creative and layout work; printing and setup fees cover plates, prepress, and any specialty finish.
Small-business label projects commonly run from the low hundreds into a few thousand dollars, depending on scope, revision rounds, and finish complexity, according to MAVRK Studio’s pricing breakdown. What catches people off guard are the extras: prepress checks, plate charges for offset runs, masks for foil or embossing, and rush fees when a launch date moves up.
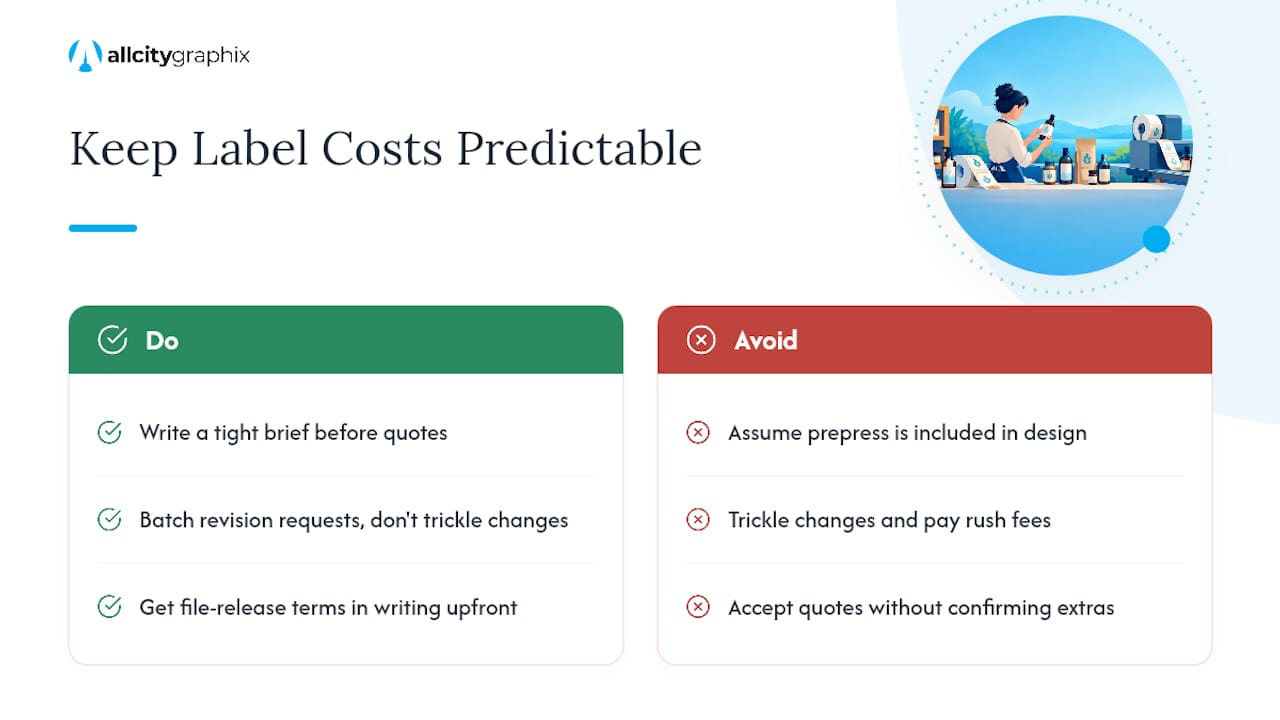
Cost Callout: Prepress and file-release work is often billed as its own service, not folded into design. Confirm this upfront so a $400 quote doesn’t quietly become $700 at final files.
To keep costs predictable: write a tight brief before requesting quotes, batch your revision requests instead of trickling in changes, and get file-release terms in writing before the project starts.
What File Specs Does Your Printer Need?
Prepress is where good-looking designs die quietly. The most common failure points: unembedded fonts, RGB files sent to a CMYK press, missing bleed, and dielines that don’t align with the actual die cutter, according to MAVRK Studio.
Run through this before you hit send:
- Color mode: confirm CMYK for process colors, or specify Pantone spot colors if brand accuracy matters
- Image and vector prep: images at 300 DPI minimum at final size, logos as vector art, all fonts outlined or embedded
- Dieline setup: bleed extending past the cut line, safe zone for text, crop marks visible, overprint settings checked
- Proofing: a digital PDF proof for layout, a physical proof for any color-critical brand, then a final signoff before the press run
Pro Tip: Ask your printer for their exact template file before you start designing. Building around their dieline from day one saves a full redesign cycle later.
When Does Hiring an Agency Actually Reduce Risk?
An agency earns its fee by catching what founders miss: regulatory placement, color management across substrates, and vendor coordination that keeps a launch on schedule. All City Graphix has handled that full arc for food and consumer brands, from packaging concept through store shelf, including the prepress handoff that prevents reprints. A typical scope runs discovery, concept, revisions, and prepress signoff, usually four to six weeks depending on SKU count and finish complexity.
— Alex
Ready to Get Your Label Print-Ready?
All City Graphix takes on the part small teams find hardest: turning a rough concept into files a printer will actually accept the first time. Where a DIY template gets you a prototype, our graphic design team builds the dieline, checks your copy against FPLA and FDA placement rules, and hands your printer a file that’s already been through prepress review.
A discovery call is where this starts. We’ll talk through your container specs, required legal copy, and brand direction, then scope out concepts, revision rounds, and a prepress proof before anything goes to press. If your label work is part of a bigger brand refresh, our full services list covers everything from logo work to ongoing marketing support. Reach out through All City Graphix to set up a discovery call and get a real timeline for your launch.
Sources
For rules and pricing benchmarks referenced throughout this guide:
- Fair Packaging and Labeling Act: Regulations Under Section 5© of the Fair Packaging and Labeling Act | Federal Trade Commission
- Product label design
FAQ
How Can I Create My Own Product Label?
Start with a template tool for layout, then check your copy against FPLA requirements: product identity, net quantity, and manufacturer name and address. For food products, follow the FDA’s PDP and information panel rules before sending anything to print.
How Much Does It Cost to Design a Product Label?
Small-business label projects typically run from the low hundreds into a few thousand dollars, depending on scope and finishes, according to MAVRK Studio. Design and printing are usually billed separately, and prepress or specialty finishes often add to the total. All City Graphix’s design and prepress pricing is available on request through a discovery call.
How Can I Design My Own Labels for Free?
Free template tools work fine for prototypes or single-event SKUs, but most free exports skip the dieline and use the wrong color mode for print. If you’re moving to a real production run, a professional prepress check catches those gaps before they become reprint costs.
What Are the Four Types of Product Labels?
Labels are commonly grouped by function: informational (ingredients, usage instructions), brand identity (logo, name, packaging design), grade or quality labels (certifications, ratings), and promotional or warning labels (claims, hazard notices). Which types apply to your product depends heavily on category, so check FDA or FTC guidance for your specific goods.